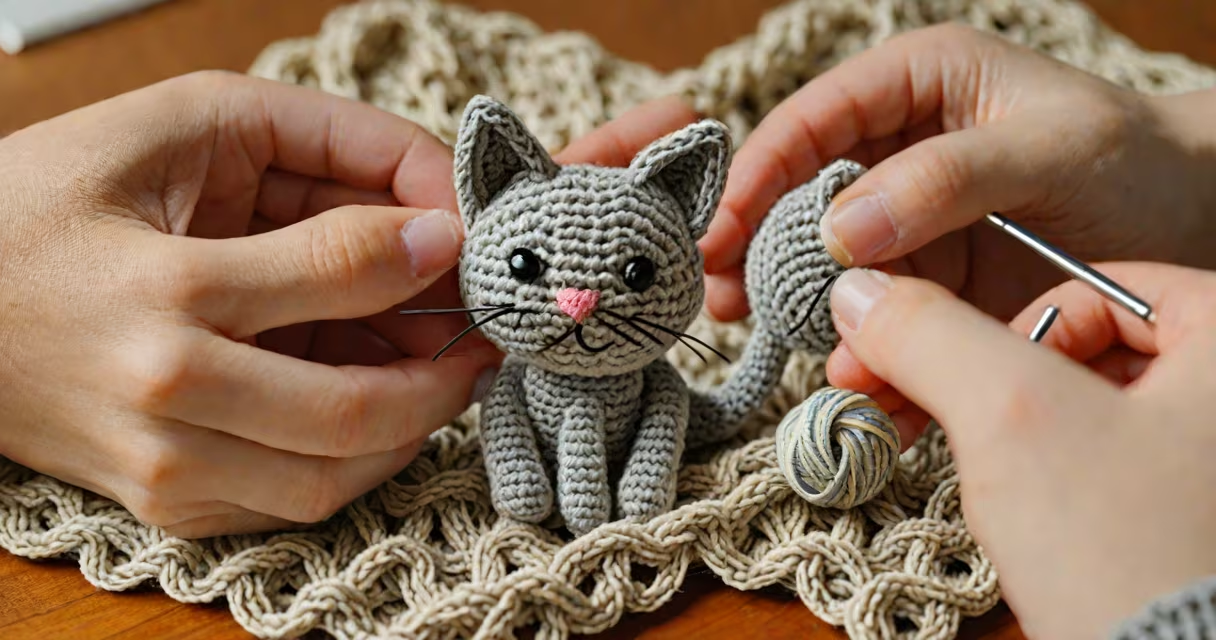
Crocheting a cat involves shaping yarn into a small, stylized feline using single crochet stitches, increasing and decreasing to form limbs, head, and body. This beginner-friendly amigurumi project uses basic techniques and typically takes 2-4 hours to complete.
Amigurumi, the Japanese art of crocheted or knitted stuffed toys, relies on precise stitch counts and tight tension to maintain structure. A standard crochet cat uses about 100-150 stitches across multiple parts: body, head, ears, legs, and tail. Most patterns use size 5mm crochet hooks and worsted-weight yarn (approximately 100g total).
Beginners often start with a simplified version-no facial details, minimal shaping, and one-piece construction. The process begins with a magic ring, then increases to form a round base. Subsequent rounds adjust stitch count to create curves and volume. For example, increasing 6 times in round 2 forms a flat circle that becomes the cat's base.
Basic supplies include a 5mm crochet hook, 100g of worsted-weight yarn (acrylic or cotton blend), a yarn needle, and safety eyes or embroidery thread for eyes. Some patterns recommend stuffing with polyester fiberfill for firmness and shape retention.
Yarn color choice affects the final look. A neutral beige with gray accents mimics a tabby cat. Using two colors allows for subtle shading-e.g., dark gray for ears and back, light cream for belly. Always check gauge: most patterns assume 18 single crochet stitches = 4 inches in width.
Start with the body. Work 6 single crochets into a magic ring. In round 2, increase to 12 stitches. Round 3 adds 6 more stitches (18 total). Continue increasing at even intervals until the body reaches 4 inches in diameter. Then decrease gradually to close the top.
Next, make the head. Begin with 6 single crochets in a ring. Increase in round 2 (12 stitches). Round 3: alternate single crochet and increase (18 stitches). Round 4: 12 single crochets. At this stage, place the head onto the body and secure with a few whip stitches.
Limbs are formed by chaining 3, then working 6 single crochets into the chain. Shape each leg by increasing at both ends, then decreasing at the base. Attach them to the body using the same method as the head. Ears are made by chaining 3, then working 5 single crochets into the third chain from the hook.
A key detail: always stuff the body and limbs as you go. Over-stuffing causes bulging; under-stuffing leads to floppy shapes. Use a small amount of fiberfill per piece-about 1 tablespoon per limb.
One frequent error is inconsistent stitch tension. Tight stitches cause puckering; loose ones create gaps. To avoid this, keep your hook tension consistent-practice on a scrap of yarn first. A good rule: if you can slide a fingernail through the stitch, it's too loose.
Another issue is misaligned parts. Ears placed too far apart give the cat a stretched appearance. Use a ruler to measure spacing: ears should be 1 inch apart center-to-center on the head. Legs should be spaced evenly around the body's middle.
Many beginners try to add facial features too early. Wait until the head is fully assembled and stuffed. Embroider eyes with backstitch using black thread. Add a nose with a tiny cross-stitch and whiskers with thin white yarn. Avoid sewing eyes directly into the fabric-this weakens the seam.
Non-obvious tip: use a stitch marker to track the beginning of each round. Place it in the first stitch of the round. Remove it only when you've completed the round. This prevents accidental skipped stitches and keeps your work aligned.
Patterns vary by complexity and design. Here's a breakdown:
| Type | Stitches Used | Time to Complete | Difficulty Level | Best For |
|---|---|---|---|---|
| Simple Cat (1-Piece) | Single crochet, increase, decrease | 1.5-2 hours | Beginner | First amigurumi project |
| Standard Cat (3-Piece) | Same as above, plus joining technique | 2.5-3.5 hours | Intermediate | Gifts, practice |
| Detail Cat (5-Piece) | Single crochet, slip stitch, embroidery | 4-5 hours | Advanced | Display pieces, shows |
Some patterns include optional features like a collar or bell. These require additional stitches-typically 4-6 rows of double crochet for a collar. Not all cats need them. A plain cat focuses on form and function.
I made my first cat using a free pattern from Ravelry. I chose a 5mm hook and Lion Brand Vanna's Choice yarn in "Cloud" (light gray). I followed the instructions exactly, including the recommended 18 stitches per round for the body.
After round 5, I noticed the shape was slightly lopsided. I checked the stitch count and realized I'd accidentally skipped an increase. I frogged (ripped out) the last 3 rounds and restarted. After fixing the error, the body became perfectly round.
Stuffing took longer than expected. I used a plastic spoon to push fiberfill into the corners. The result was firm but not hard-just enough to hold shape when held.
Final touch: I embroidered the face with a running stitch for the mouth and tiny French knots for the eyes. The cat now sits on my desk. It's not perfect-but it's mine.
Understanding how to crochet a cat requires attention to stitch count, tension, and timing. The process teaches control, spatial reasoning, and patience. With practice, you'll recognize when a shape is off before it becomes obvious.
Once you master the basics, you can adapt the pattern to create different breeds-Persian, Siamese, or even a cartoon cat with oversized eyes. The core skills remain the same: increase, decrease, join, stuff.
Learning how to crochet a cat builds confidence in handling small, complex shapes. It's a practical gateway into amigurumi, which can lead to larger projects like bears, birds, or seasonal figures.